
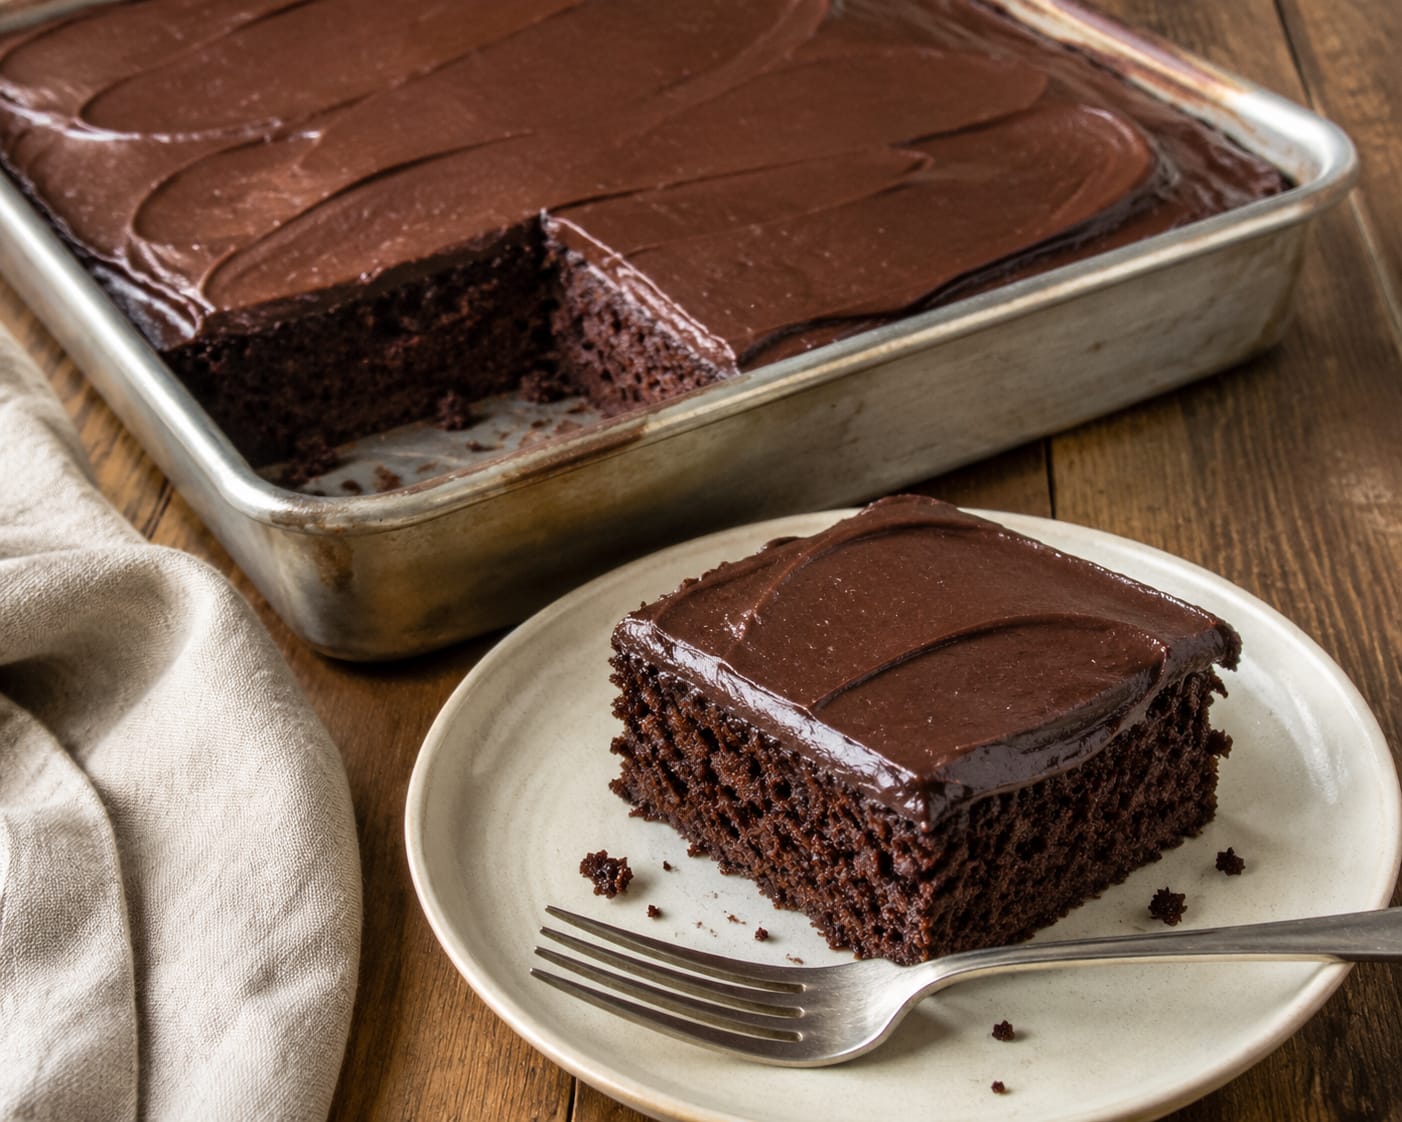

Bubby’s Treasured Chocolate Cake
An easy, super-moist family chocolate cake with silky chocolate frosting. This is the dependable chocolate cake for birthdays, Shabbos, and family celebrations – easy enough for a first-time baker and delicious enough to become the cake children remember and eventually make for their own families. The cake stays exceptionally moist, and the smooth chocolate frosting makes it feel special without complicated decorating.
Ingredients
Equipment
Method
- Bring the cold ingredients to room temperature. The eggs and almond milk should not be refrigerator-cold. Room-temperature ingredients combine more evenly.
- Prepare the oven and pan. Place a rack in the center of the oven and preheat to 350°F / 175°C. Lightly grease the pan. Line the bottom and two long sides with parchment, leaving enough overhang to help lift the cake later.
- Make the dairy-free sour milk. Stir the almond milk and vinegar together. Let it stand for 5 minutes. Almond milk may not look heavily curdled; that is normal. The vinegar is still providing acidity for the baking soda.
- Combine the dry ingredients. In a large bowl, whisk the flour, cocoa, sugar, baking soda, baking powder, and salt for about 30 seconds. Break up every visible cocoa or baking-soda lump.
- Combine the wet ingredients. In a second bowl, whisk the eggs, oil, vanilla, and almond-milk mixture until evenly blended.
- Begin the batter. Pour the wet ingredients into the dry ingredients. Whisk gently just until most of the dry ingredients are incorporated.
- Add the coffee. Slowly pour in the hot coffee while whisking gently. Scrape the bottom and sides of the bowl with a spatula. The batter will be very thin; do not add extra flour.
- Fill the pan. Pour the batter into the prepared pan. Gently tap the pan once or twice on the counter to release large air bubbles.
- Bake. Bake for 35-40 minutes. Begin checking at 35 minutes.
- Check for doneness. The center should spring back lightly when touched, and the edges may just begin pulling from the pan. A toothpick inserted in the center should have a few moist crumbs but no liquid batter. If using a thermometer, the center will generally be 200-205°F / 93-96°C.
- Cool completely. Place the pan on a wire rack and let the cake cool completely, about 1-1 1/2 hours. Do not put frosting on a warm cake.
- Prepare the chocolate. Place the finely chopped chocolate in a clean heat-safe bowl. Small, evenly chopped pieces melt more reliably.
- Heat the cream. Heat the non-dairy whipping cream until steaming, with small bubbles appearing around the edge. Do not let it boil vigorously.
- Pour and wait. Pour the hot cream evenly over the chocolate. Leave it untouched for 3 minutes so the chocolate can soften.
- Stir until smooth. Begin stirring slowly in the center, gradually widening the circles until the frosting is completely smooth and glossy.
- Finish the frosting. Stir in the oil, vanilla, and salt.
- Let it thicken. Leave the frosting at room temperature for 20-40 minutes, stirring occasionally, until it is thick enough to spread without running off the cake.
- Frost the cake. Spread the frosting evenly over the completely cooled cake. Let it set for another 30-60 minutes before cutting.
- Cut cleanly. Dip a sharp knife into hot water, wipe it dry, and clean it between cuts.
Notes
What a Beginner Should Look For
Dry mixture: Evenly colored with no pale baking soda lumps.
Finished batter: Smooth, glossy, and much thinner than ordinary cake batter.
Baked cake: Set across the center, softly springy, with a few moist crumbs on the tester.
Frosting before spreading: Glossy and thick enough to hold soft trails from the spatula.
Finished slice: Moist, tender chocolate crumb beneath a smooth, thick chocolate layer. Beginner Tips
Measure the flour and cocoa carefully. Use a scale when possible. Extra flour or cocoa can make chocolate cake dry.
Use natural cocoa powder. The baking soda and vinegar are balanced for natural cocoa.
Do not worry about the thin batter. A pourable batter is correct for this cake.
Use ordinary brewed coffee. Coffee strengthens the chocolate flavor without making the cake taste like coffee.
Do not overbake. Start checking at 35 minutes, and remove the cake when the tester comes out with a few moist crumbs.
Cool completely before frosting. Even a slightly warm cake can melt the frosting. Troubleshooting
The cake sank in the center: It was probably underbaked, the oven door was opened early, or the baking soda or baking powder was no longer active.
The cake is dry: Too much flour or cocoa was measured, or the cake baked too long.
The cake is dense: The batter may have been overmixed after the flour was added.
The coffee flavor is noticeable: Use regular-strength coffee rather than espresso or concentrated coffee.
The frosting is runny: It is probably still warm. Let it stand longer or refrigerate it for 5-10 minutes, checking frequently.
The frosting is too firm: Warm it very gently or stir in 1 tsp warm non-dairy whipping cream.
The frosting looks oily or grainy: Stir in 1 tsp warm non-dairy cream slowly until it comes back together.
The frosting melted into the cake: The cake was still warm when you frosted it. Make Ahead
Bake the cake one day ahead, cool completely, and cover tightly at room temperature. The fully frosted cake can be made 1-2 days before serving. Its chocolate flavor becomes even deeper after resting.
The frosting can be prepared up to 3 days ahead and refrigerated. Warm it very gently until spreadable. Storage
Unfrosted cake: Store in an airtight container at room temperature for up to 3 days.
Frosted cake: Refrigerate in an airtight container for up to 5 days.
Before serving: Let refrigerated cake stand at room temperature for 30-45 minutes so the cake and frosting soften. Freezing
Wrap individual pieces or the entire cooled cake tightly. Freeze for up to 2 months. Thaw overnight in the refrigerator, then bring to room temperature before serving. Reheating
Reheating is normally unnecessary. If desired, microwave one refrigerated slice for only 5-8 seconds. Longer heating may melt the chocolate frosting. Optional Variations
Coffee-Free: Replace the coffee with the same amount of hot water. The cake will still work but will have slightly less intense chocolate flavor.
Nut-Free: Replace the almond milk with unsweetened soy milk.
Simple Finish: Omit the frosting and dust the completely cooled cake lightly with confectioners’ sugar.
Celebration Finish: Add pareve chocolate curls or restrained sprinkles while the frosting is still soft. Bubby’s Tip
Make this cake the day before serving. Once covered and rested, the crumb becomes even more moist, and the chocolate flavor deepens.
Dry mixture: Evenly colored with no pale baking soda lumps.
Finished batter: Smooth, glossy, and much thinner than ordinary cake batter.
Baked cake: Set across the center, softly springy, with a few moist crumbs on the tester.
Frosting before spreading: Glossy and thick enough to hold soft trails from the spatula.
Finished slice: Moist, tender chocolate crumb beneath a smooth, thick chocolate layer. Beginner Tips
Measure the flour and cocoa carefully. Use a scale when possible. Extra flour or cocoa can make chocolate cake dry.
Use natural cocoa powder. The baking soda and vinegar are balanced for natural cocoa.
Do not worry about the thin batter. A pourable batter is correct for this cake.
Use ordinary brewed coffee. Coffee strengthens the chocolate flavor without making the cake taste like coffee.
Do not overbake. Start checking at 35 minutes, and remove the cake when the tester comes out with a few moist crumbs.
Cool completely before frosting. Even a slightly warm cake can melt the frosting. Troubleshooting
The cake sank in the center: It was probably underbaked, the oven door was opened early, or the baking soda or baking powder was no longer active.
The cake is dry: Too much flour or cocoa was measured, or the cake baked too long.
The cake is dense: The batter may have been overmixed after the flour was added.
The coffee flavor is noticeable: Use regular-strength coffee rather than espresso or concentrated coffee.
The frosting is runny: It is probably still warm. Let it stand longer or refrigerate it for 5-10 minutes, checking frequently.
The frosting is too firm: Warm it very gently or stir in 1 tsp warm non-dairy whipping cream.
The frosting looks oily or grainy: Stir in 1 tsp warm non-dairy cream slowly until it comes back together.
The frosting melted into the cake: The cake was still warm when you frosted it. Make Ahead
Bake the cake one day ahead, cool completely, and cover tightly at room temperature. The fully frosted cake can be made 1-2 days before serving. Its chocolate flavor becomes even deeper after resting.
The frosting can be prepared up to 3 days ahead and refrigerated. Warm it very gently until spreadable. Storage
Unfrosted cake: Store in an airtight container at room temperature for up to 3 days.
Frosted cake: Refrigerate in an airtight container for up to 5 days.
Before serving: Let refrigerated cake stand at room temperature for 30-45 minutes so the cake and frosting soften. Freezing
Wrap individual pieces or the entire cooled cake tightly. Freeze for up to 2 months. Thaw overnight in the refrigerator, then bring to room temperature before serving. Reheating
Reheating is normally unnecessary. If desired, microwave one refrigerated slice for only 5-8 seconds. Longer heating may melt the chocolate frosting. Optional Variations
Coffee-Free: Replace the coffee with the same amount of hot water. The cake will still work but will have slightly less intense chocolate flavor.
Nut-Free: Replace the almond milk with unsweetened soy milk.
Simple Finish: Omit the frosting and dust the completely cooled cake lightly with confectioners’ sugar.
Celebration Finish: Add pareve chocolate curls or restrained sprinkles while the frosting is still soft. Bubby’s Tip
Make this cake the day before serving. Once covered and rested, the crumb becomes even more moist, and the chocolate flavor deepens.

Leave a Reply